
Dough-juggling in the kitchen is one of my favorite pastimes, and when it results in homemade pita bread that’s perfectly soft and puffy, it’s like winning the tasty lottery! Let’s roll up those sleeves and dive into the wonderfully therapeutic world of kneading, where flour dust transforms into magic.
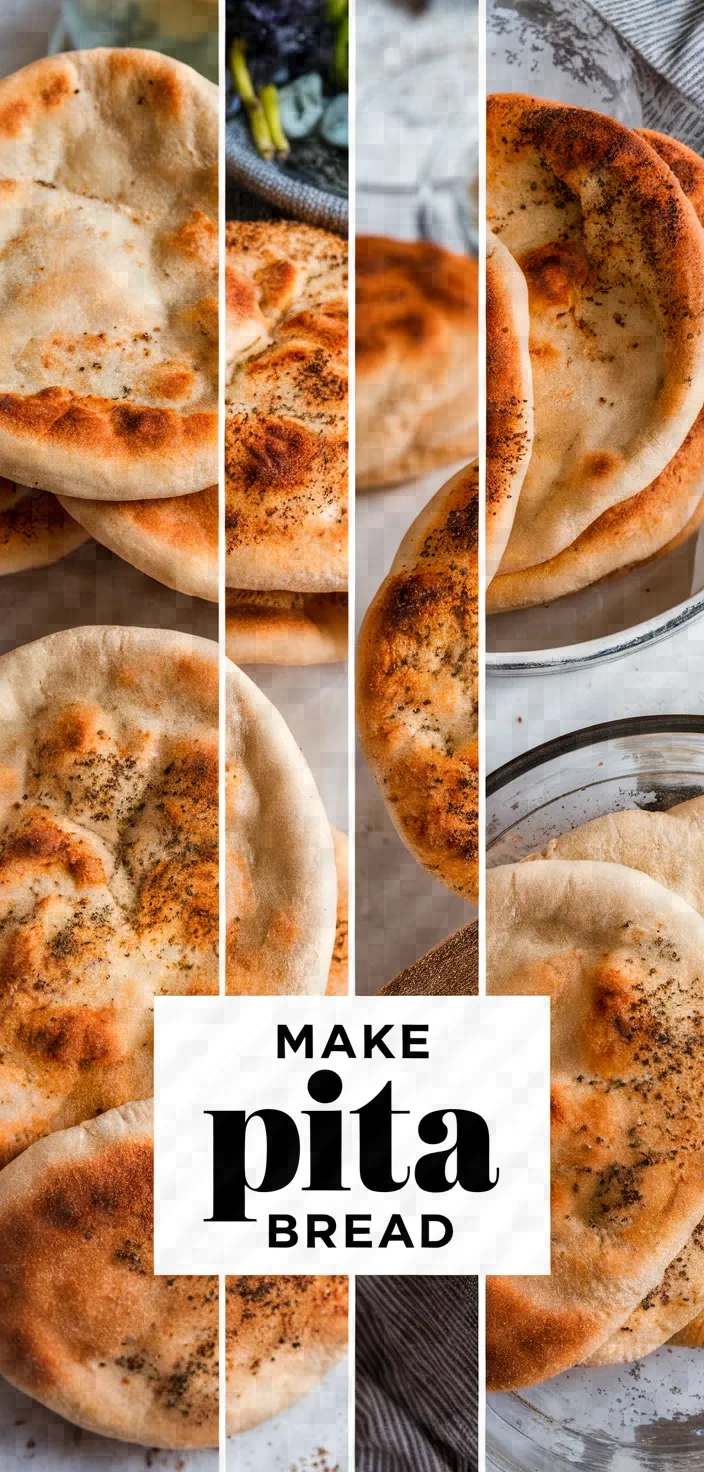
It’s a sweet thing to make pita bread at home! I adore the way that all-purpose flour, active dry yeast, and olive oil come together to form a soft yet crisp bread.
A touch of salt and sugar takes it to the next level of flavor, and warm water helps achieve that perfectly puffed texture. But of course, I can’t take all the credit.
My mom taught me the Pita Bread 101 course.
How To Make Pita Bread Recipe Ingredients
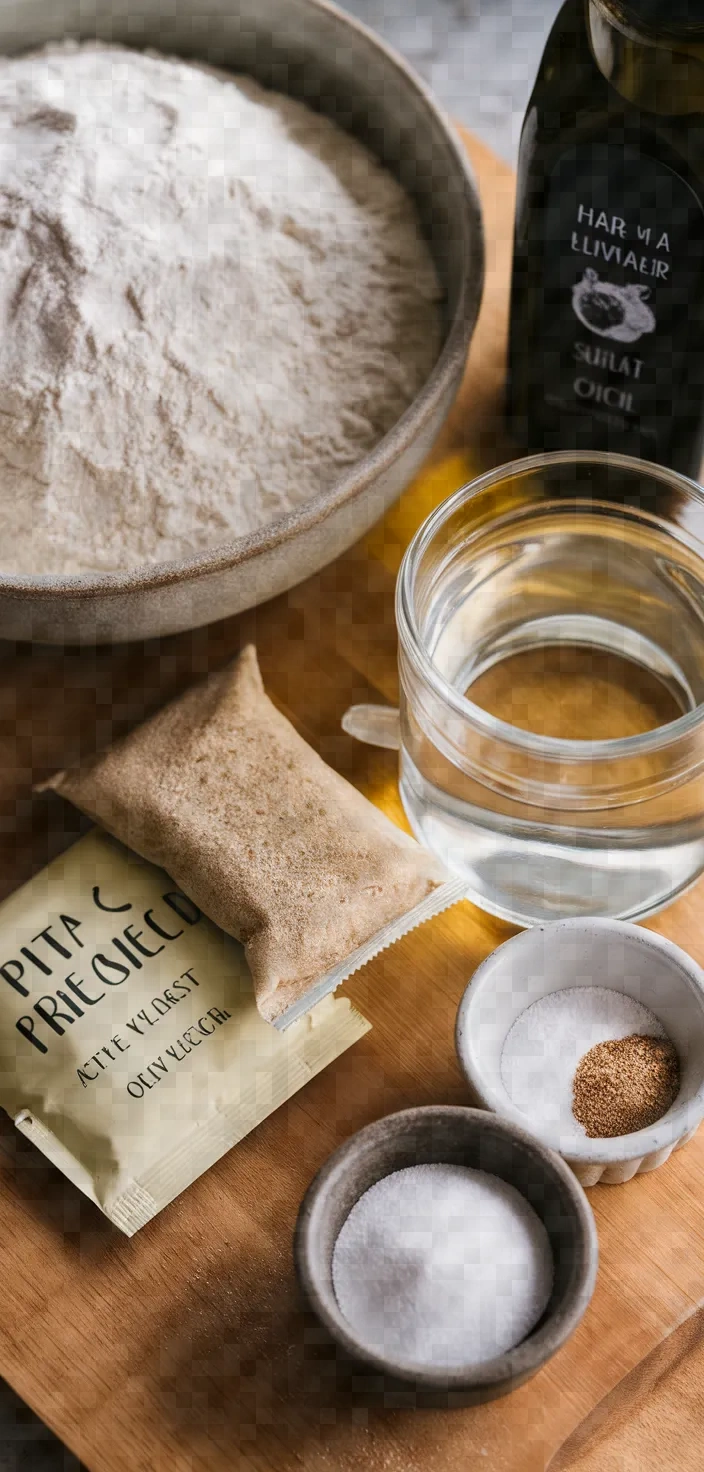
- All-Purpose Flour: Provides the base and structure; high in carbohydrates.
- Active Dry Yeast: Aids in rising and fermentation, making bread fluffy.
- Olive Oil: Adds a hint of moisture; a source of healthy fats.
- Salt: Enhances flavor and controls yeast activity.
- Sugar: Feeds yeast for rising and adds slight sweetness.
How To Make Pita Bread Recipe Ingredient Quantities
- 2 cups all-purpose flour
- 1 package (2 1/4 teaspoons) active dry yeast
- 3/4 cup warm water (about 110°F/45°C)
- 1 tablespoon olive oil
- 1 teaspoon salt
- 1 teaspoon sugar
- Extra flour for dusting
How to Make this How To Make Pita Bread Recipe
1. Combine in a small bowl the warm water and sugar. Then, sprinkle the yeast on top and mix. Let it sit for 5 to 10 minutes until it is frothy.
2. In a sizable mixing bowl, mix together the flour and salt. In the middle, make a space and add the yeast mixture and olive oil.
3. Mix using a wooden spoon until a rough dough forms.
4. Move the dough to a floured counter and knead it for about 8 to 10 minutes. This will make the dough smooth and elastic.
5. Put the dough in a bowl that’s been oiled lightly, and cover it up with a damp cloth or some plastic wrap. Let the dough rise in a warm spot for about 1 to
1.5 hours, or until it looks like it has doubled in size.
6. Set your oven to 475°F (245°C) and put a baking stone or an inverted baking sheet in the middle of the oven.
7. Deflate the dough and cut it into 6 to 8 equal parts. Shape each part into a ball and then into a disc with a thickness of about 1/4 inch. Use a rolling pin and additional flour as needed to keep the dough from sticking to the pin or the work surface.
8. Place the dough discs with care onto the hot baking stone or sheet. Let them bake for 3 to 5 minutes. Watch for puffing and a slight browning to indicate doneness.
9. Take the pitas out of the oven and cover them immediately with a clean towel. This will keep them soft while they cool.
10. Serve them warm or keep the cooled pitas in an airtight container for a few days. Enjoy them as-is or with any fillings you like.
How To Make Pita Bread Recipe Equipment Needed
1. Small bowl
2. Large mixing bowl
3. Wooden spoon
4. Measuring cups
5. Measuring spoons
6. Rolling pin
7. Plastic wrap or damp cloth
8. Baking stone or inverted baking sheet
9. Clean towel
FAQ
- Q: Can I use whole wheat flour instead of all-purpose flour?A: Indeed, you have the option to use whole wheat flour, but the texture might be affected. For a better balance, think about using a mixture of all-purpose and whole wheat flour.
- Q: What if my dough doesn’t rise?A: Use fresh yeast and water that’s properly heated. Let the dough rise in a warm, still area.
- Q: Can I make the dough ahead of time?A: Yes, the dough can be prepared ahead of time, then kept in the refrigerator for a maximum of 2 days. It is necessary to allow it to return to room temperature before baking.
- Q: Why doesn’t my pita bread puff up?A: Make sure the oven is at the right temperature. You want it really hot. Thin the dough nicely; it should be even. Then wrap it around whatever you’re making.
- Q: Can I freeze baked pita bread?A: Yes, you can freeze pita bread. For optimal results, ensure that the bread is well-wrapped in plastic wrap, and then place it in a freezer bag. The bread can last in the freezer for about three months.
- Q: How do I store leftover pita bread?A: Store leftover pita in an airtight container at room temperature for up to 3 days, or refrigerate to prolong shelf life a bit.
- Q: Can I use a bread machine for the dough?A: Yes, a bread machine can be used on the dough setting before rolling and baking the bread according to the provided directions.
How To Make Pita Bread Recipe Substitutions and Variations
All-purpose flour: You can replace it with whole wheat flour, and you’ll get a nuttier flavor and denser texture.
For active dry yeast, instant yeast can be used in equal amounts; no need to first activate it in water.
Vegetable oil or melted butter: Substitute for olive oil when you want a slightly different flavor.
Salt: You can use either sea salt or kosher salt, adjusting to taste as they might yield different flavors due to varying grain size.
Sweetness can be obtained from honey or maple syrup. These are natural sweeteners whose flavors are often too subtle to be noticed, but if you can discern the sweetness these impart, they can be a delicious addition to whatever you’re making.
Pro Tips
1. Optimize Yeast Activation Ensure your water is at the correct temperature (around 110°F/45°C) to activate the yeast effectively. If the water is too hot, the yeast may die; too cold, and it may not activate properly. Use a thermometer to get it just right.
2. Resting Environment For optimal dough rising, place it in a slightly warm, draft-free environment. If your kitchen is cold, preheat your oven for a minute, turn it off, and place your covered dough bowl inside with the door slightly ajar.
3. Kneading Technique Knead the dough until it’s no longer sticky and has a smooth texture. You can do a “windowpane test” by stretching a small piece of dough; if it doesn’t tear and lets light through, you’ve kneaded enough.
4. Preventing Stickiness When rolling out the dough discs, avoid adding too much flour, which can make them tough. Dust lightly and ensure your rolling pin is floured, which helps in achieving even thickness without sticking.
5. Quick Cooling Cover Covering the pitas with a towel immediately after baking helps trap the steam, ensuring they remain soft and pliable. For extra softness, you can use a slightly damp towel.

How To Make Pita Bread Recipe
My favorite How To Make Pita Bread Recipe
Equipment Needed:
1. Small bowl
2. Large mixing bowl
3. Wooden spoon
4. Measuring cups
5. Measuring spoons
6. Rolling pin
7. Plastic wrap or damp cloth
8. Baking stone or inverted baking sheet
9. Clean towel
Ingredients:
- 2 cups all-purpose flour
- 1 package (2 1/4 teaspoons) active dry yeast
- 3/4 cup warm water (about 110°F/45°C)
- 1 tablespoon olive oil
- 1 teaspoon salt
- 1 teaspoon sugar
- Extra flour for dusting
Instructions:
1. Combine in a small bowl the warm water and sugar. Then, sprinkle the yeast on top and mix. Let it sit for 5 to 10 minutes until it is frothy.
2. In a sizable mixing bowl, mix together the flour and salt. In the middle, make a space and add the yeast mixture and olive oil.
3. Mix using a wooden spoon until a rough dough forms.
4. Move the dough to a floured counter and knead it for about 8 to 10 minutes. This will make the dough smooth and elastic.
5. Put the dough in a bowl that’s been oiled lightly, and cover it up with a damp cloth or some plastic wrap. Let the dough rise in a warm spot for about 1 to
1.5 hours, or until it looks like it has doubled in size.
6. Set your oven to 475°F (245°C) and put a baking stone or an inverted baking sheet in the middle of the oven.
7. Deflate the dough and cut it into 6 to 8 equal parts. Shape each part into a ball and then into a disc with a thickness of about 1/4 inch. Use a rolling pin and additional flour as needed to keep the dough from sticking to the pin or the work surface.
8. Place the dough discs with care onto the hot baking stone or sheet. Let them bake for 3 to 5 minutes. Watch for puffing and a slight browning to indicate doneness.
9. Take the pitas out of the oven and cover them immediately with a clean towel. This will keep them soft while they cool.
10. Serve them warm or keep the cooled pitas in an airtight container for a few days. Enjoy them as-is or with any fillings you like.


